Record Payments
Log payments against your budget items, track payment history by month, and view spending by vendor.
Last updated February 21, 2026
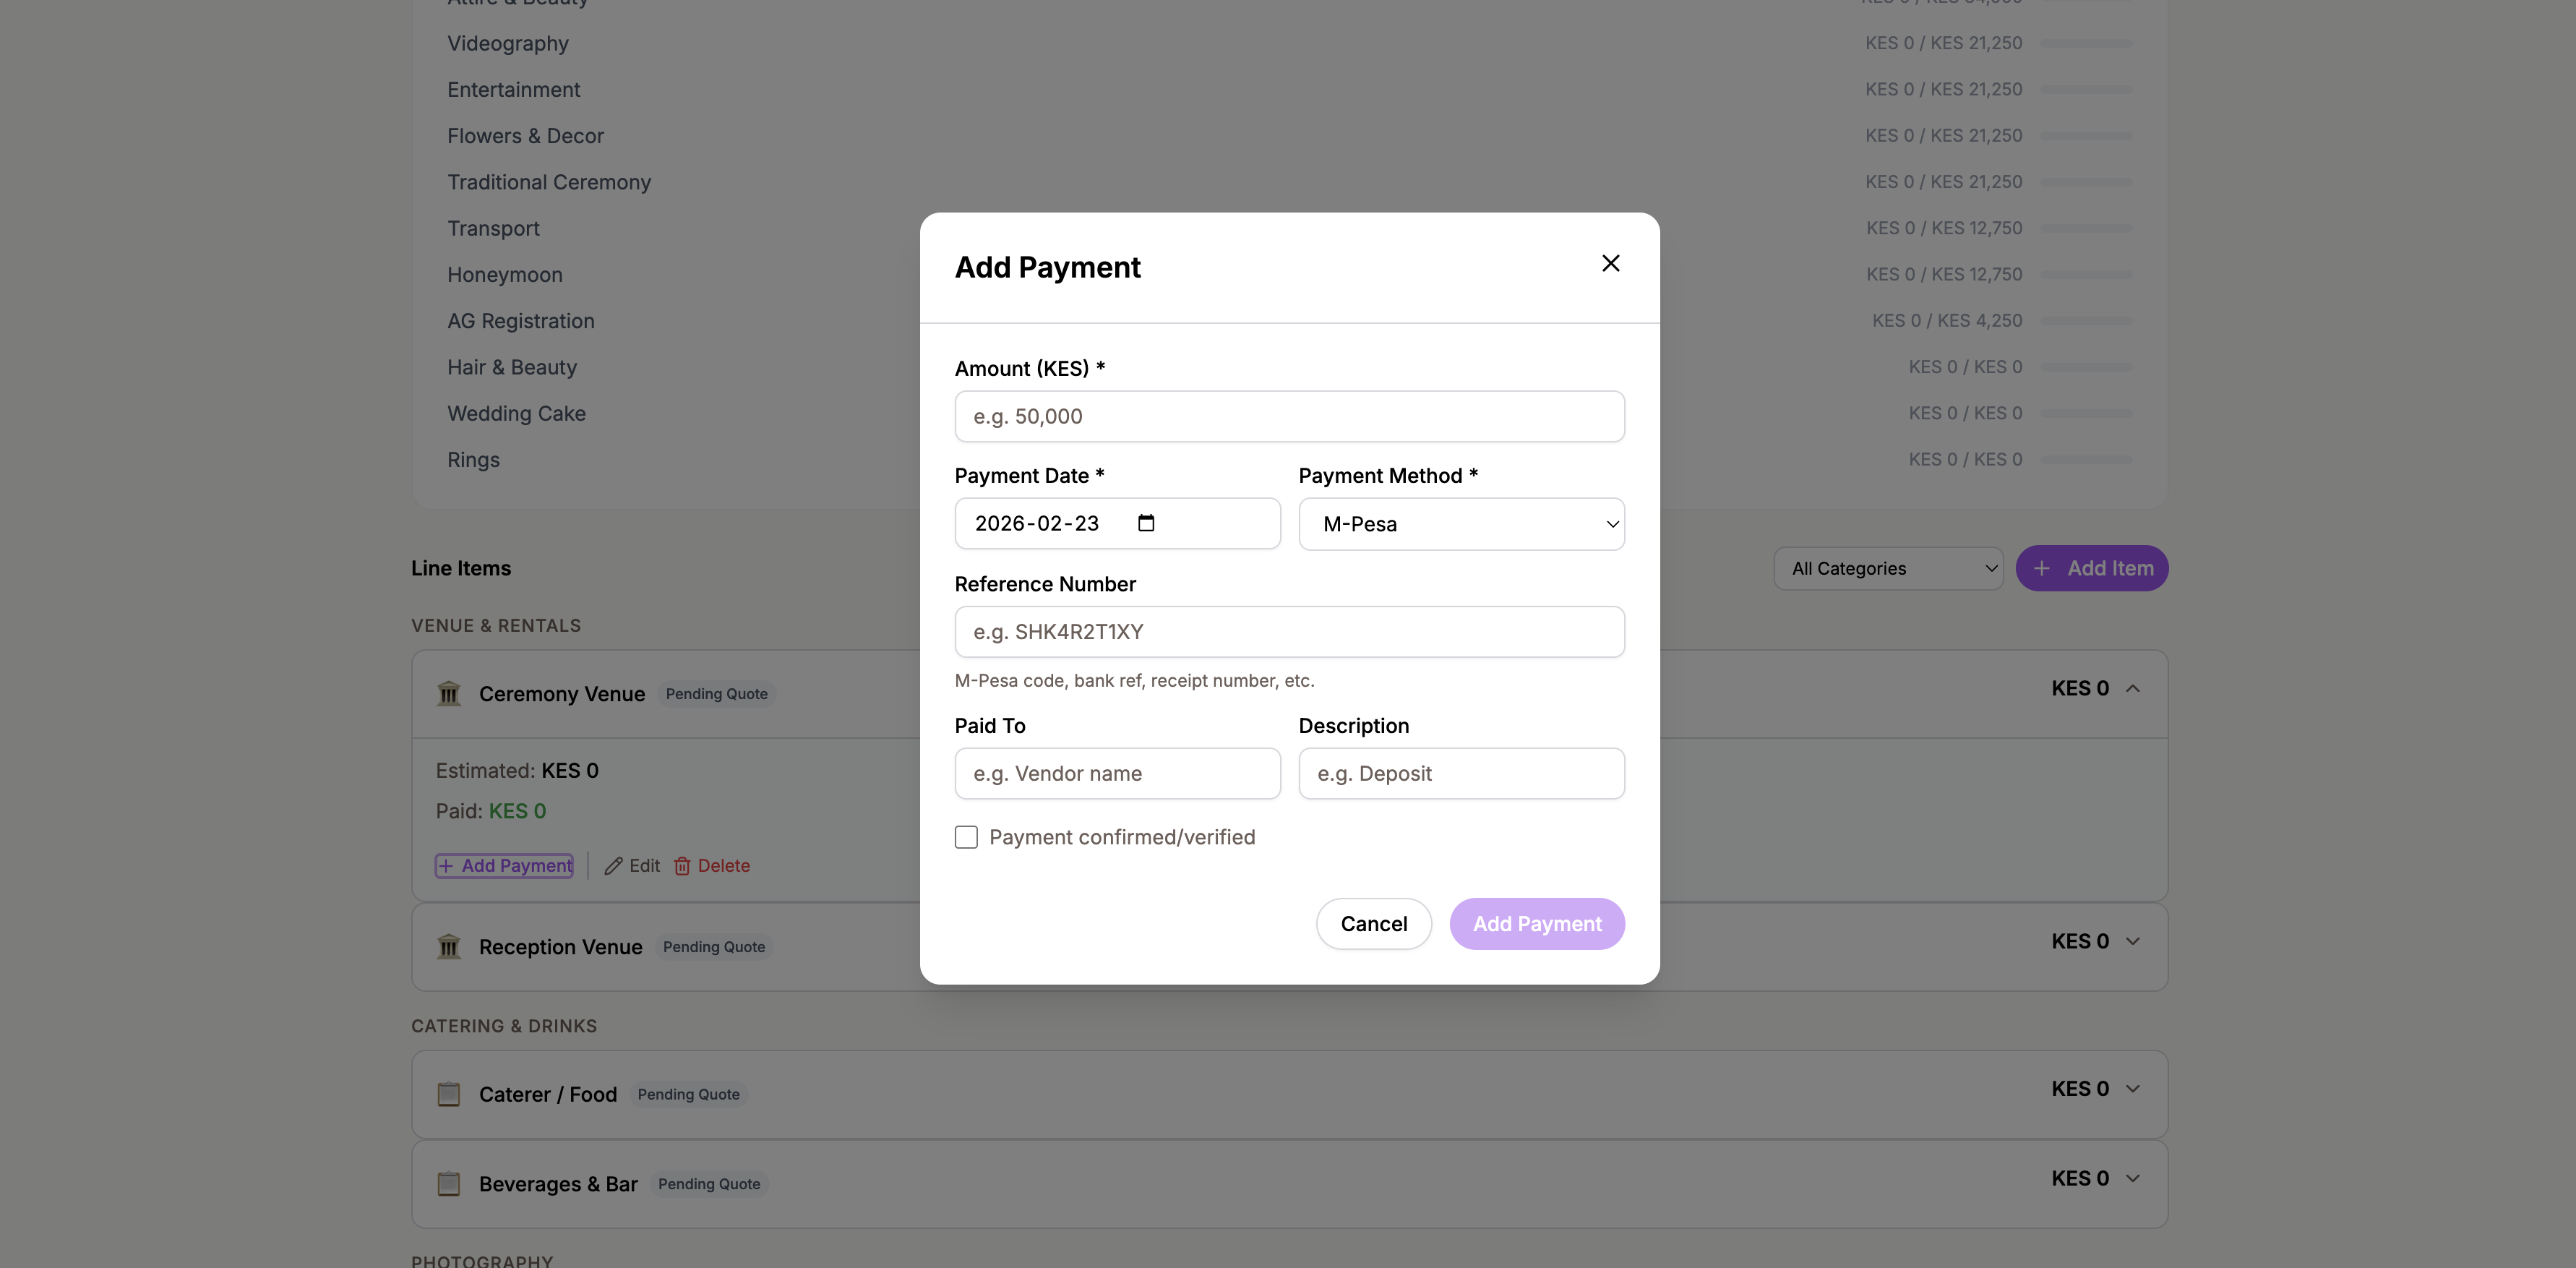
Adding a payment
To record a payment against a budget item:
- Open the Budget page and find the line item you made a payment for
- Expand the line item card and click Add Payment
- Fill in the payment details:
- Amount — how much you paid
- Date — when the payment was made
- Payment method — choose from M-Pesa, Bank Transfer, Cash, Card, Cheque, or Other
- Reference number — a transaction ID, receipt number, or M-Pesa code for your records
- Paid to — who received the payment
- Description — a short note about what the payment was for
- Click Save to record the payment
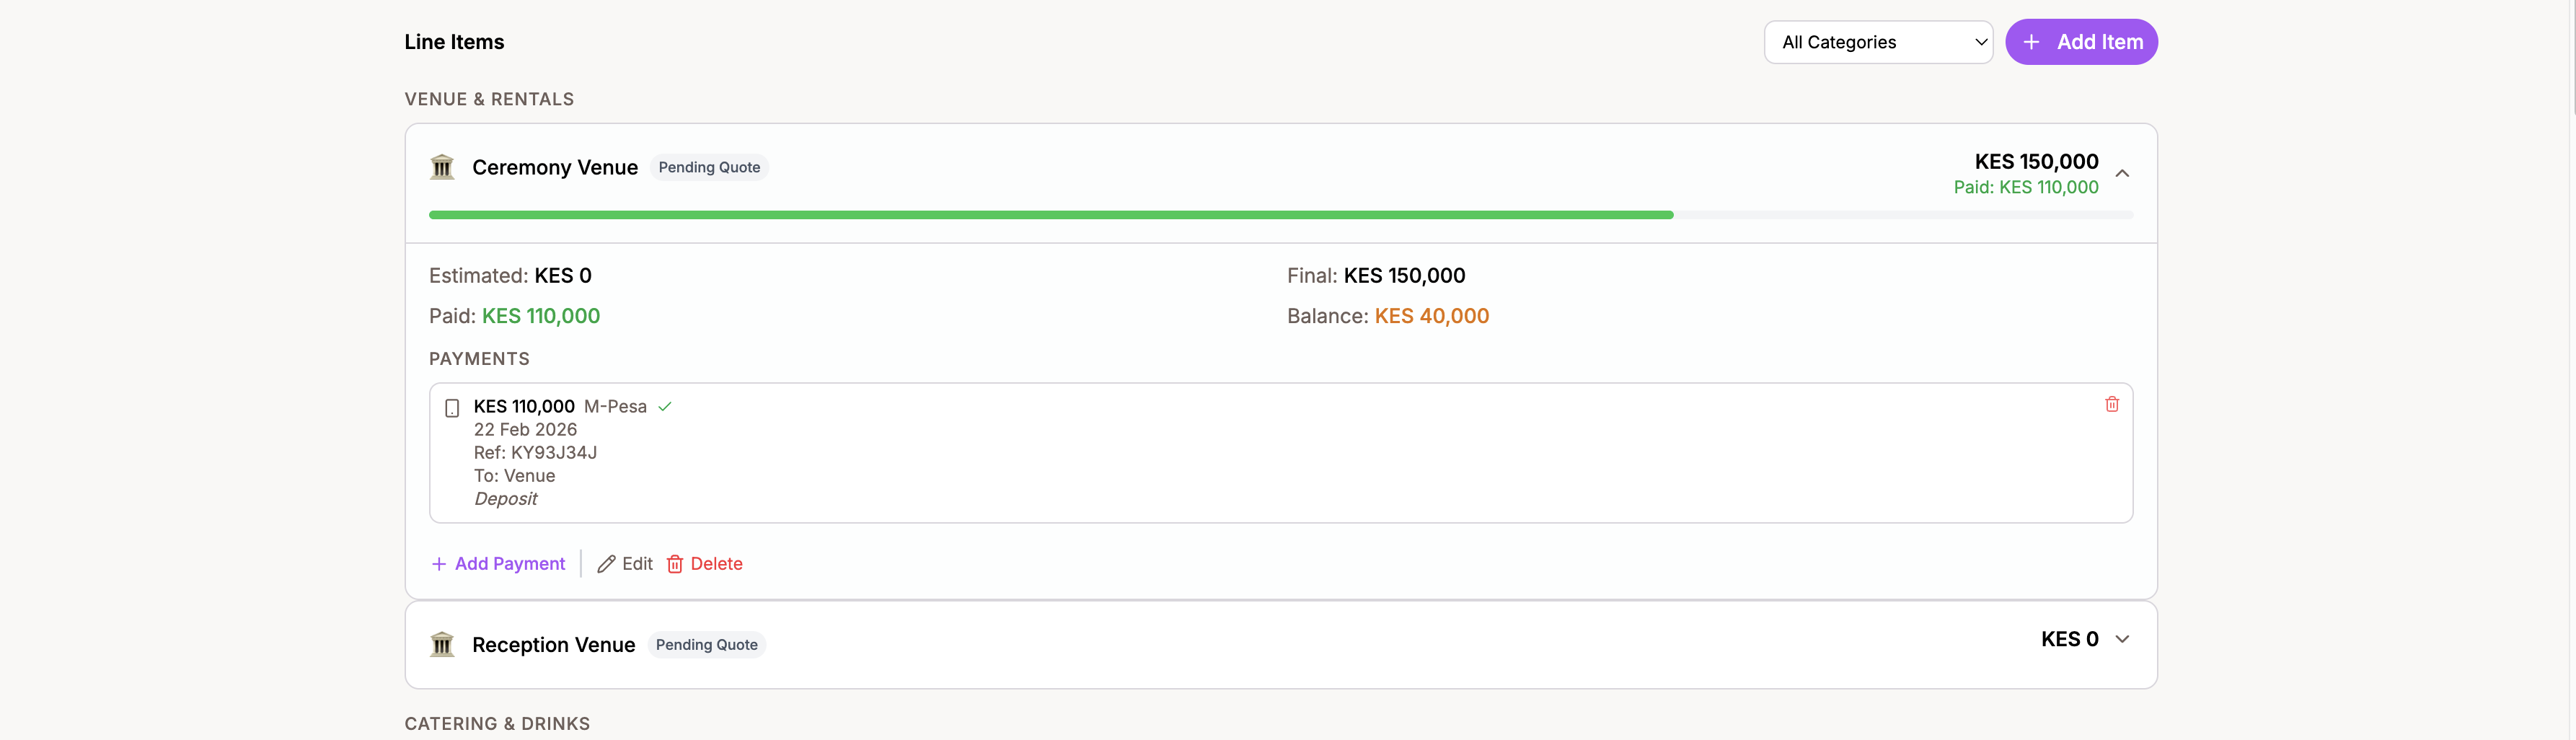
Automatic status updates
When you record payments, the system automatically tracks whether a line item is fully paid. A database trigger checks the total payments against the item’s cost and updates the status to Paid when the full amount has been covered.
You don’t need to manually mark items as paid. Just keep recording your payments and the system handles the rest.
Confirming payments
Each payment has a confirmation flag. When a payment is confirmed, it shows a green check mark next to it. This is useful for distinguishing between payments you’ve initiated and payments that have been verified or cleared.
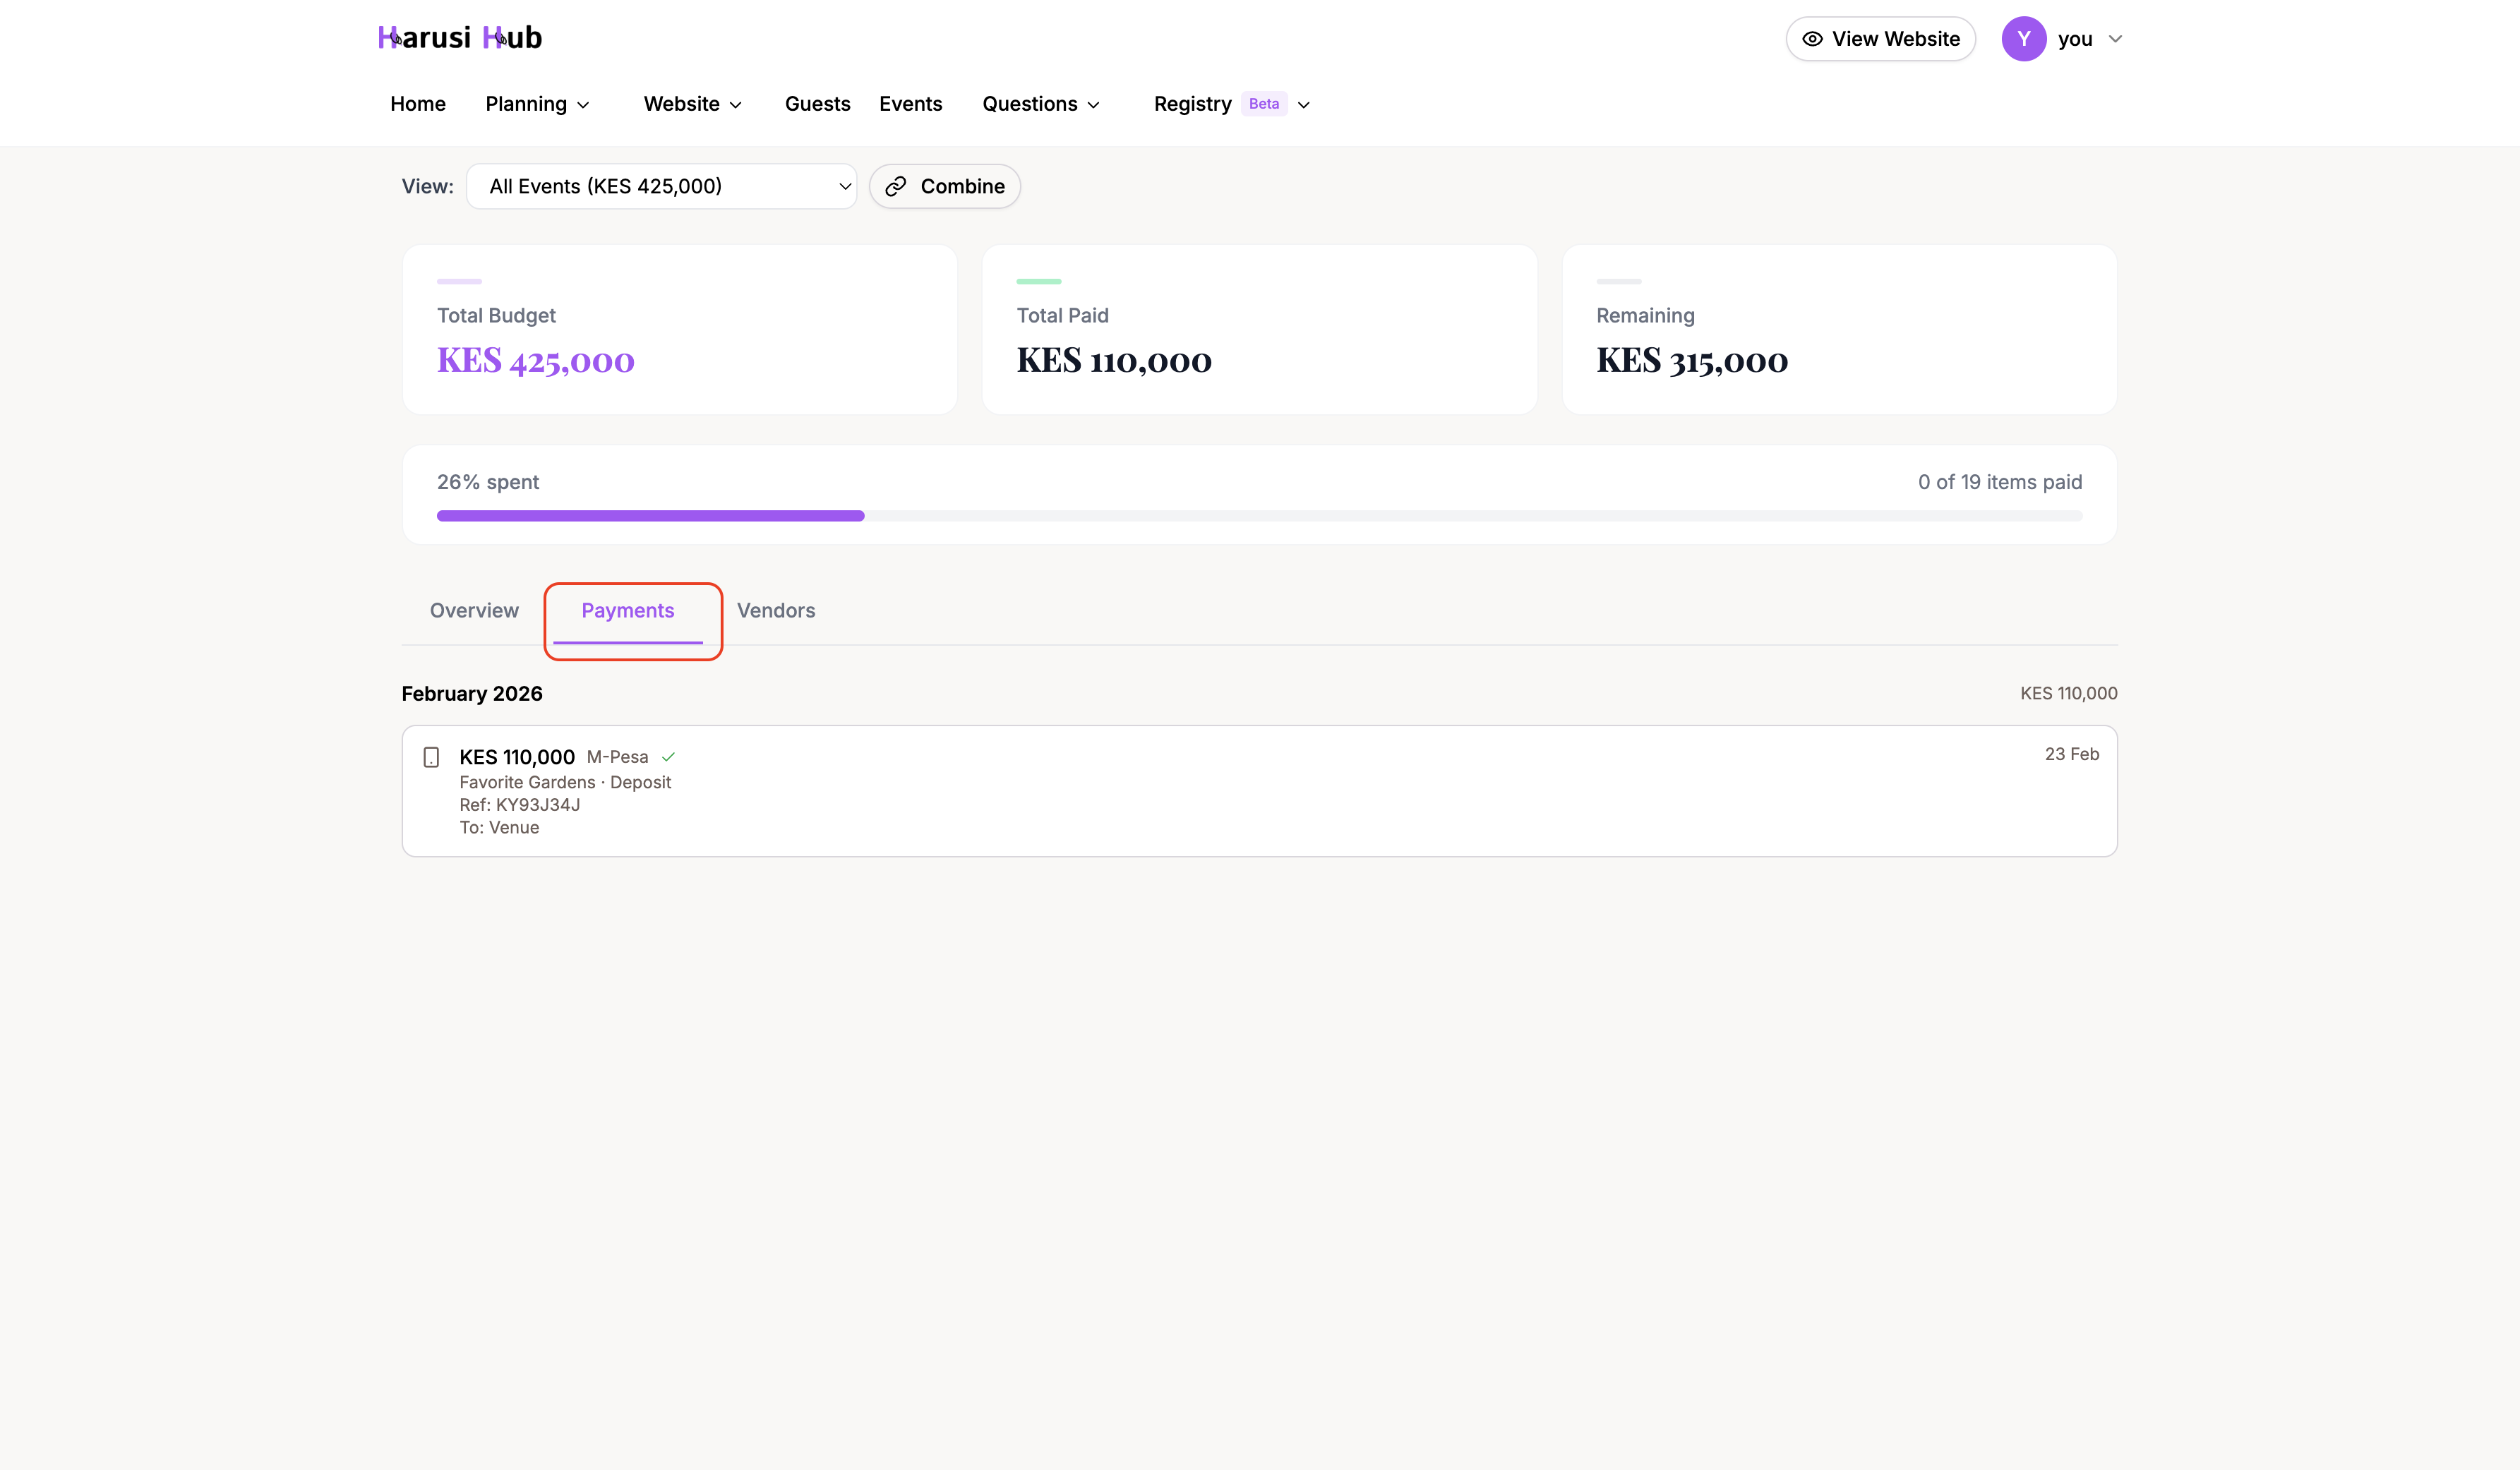
The Payments tab
Switch to the Payments tab on the Budget page to see all your payments in one place. Payments are organized in a timeline grouped by month, with the most recent month at the top.
Each payment entry shows:
- A method icon (M-Pesa, bank, cash, etc.)
- The amount paid
- The vendor or item name it was applied to
- A short description and reference number
- The date the payment was made
This view makes it easy to review your spending history at a glance.
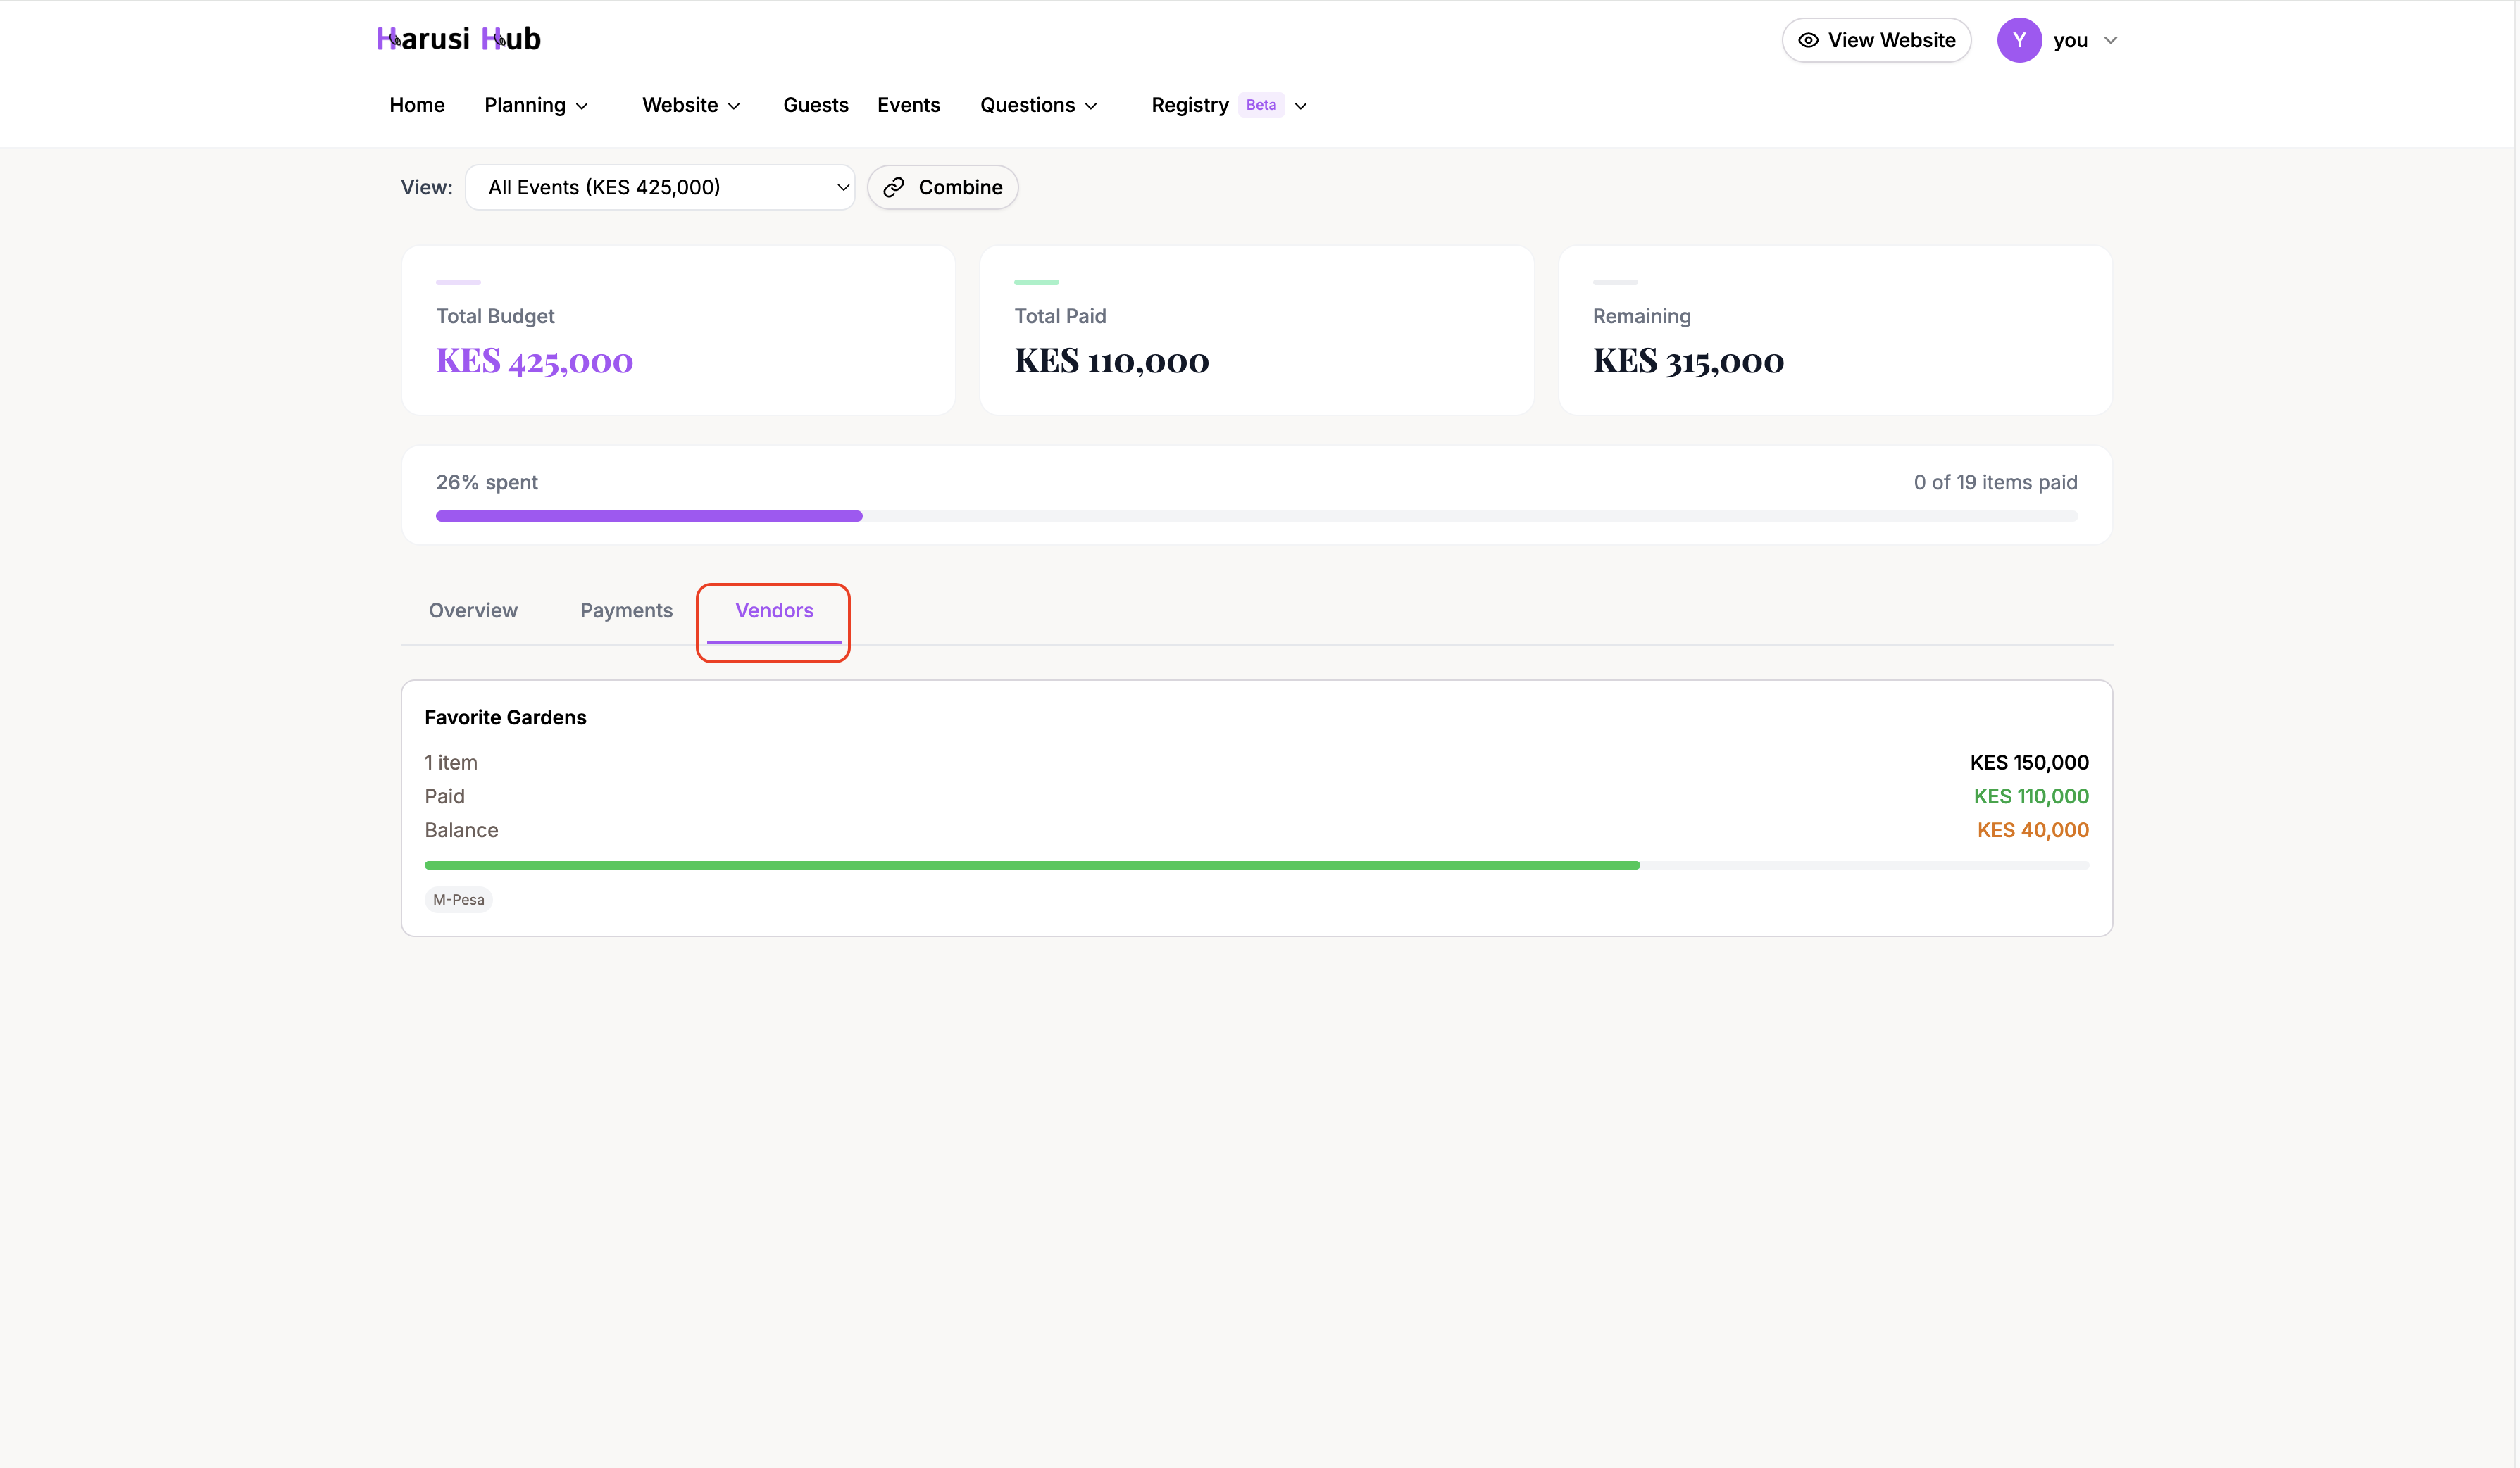
The Vendors tab
The Vendors tab groups your spending by vendor so you can see exactly how much you’ve paid each one. For each vendor, you’ll see:
- Contact details — name, phone, and email
- Total cost — the sum of all line items assigned to that vendor
- Paid amount — how much you’ve paid them so far
- Balance — what’s still outstanding
- Payment methods used — which methods you’ve used for that vendor
This is helpful when you need to check how much you still owe a specific vendor or want their contact info in one place.
Deleting a payment
If you recorded a payment by mistake, expand the line item and find the payment in the payment history section. Click Delete next to the payment you want to remove.
When you delete a payment, the system automatically recalculates the line item’s paid total and status. If deleting a payment means the item is no longer fully paid, the status will update accordingly.
Viewing payment history on a line item
You can always see the full payment history for any line item by expanding its card. The payment history section at the bottom lists every payment with its amount, date, method, and reference number.
Tips for tracking payments
- Record payments right away so you don’t forget. It only takes a few seconds and keeps your budget accurate.
- Use reference numbers for every payment. This makes it easy to match payments with bank statements or M-Pesa messages later.
- Check the Vendors tab before making a payment to see your current balance with each vendor.
- Confirm payments once they’ve cleared to keep a clean record of verified transactions.