Add Collaborators and Set Permissions
Invite your partner and bridal party members to help plan your wedding with customizable access levels.
Last updated May 4, 2026
You don’t have to plan your wedding alone. Harusi Hub lets you invite collaborators — your partner, bridesmaids, groomsmen, and other members of your wedding party — and control exactly what each person can access.
Getting to Your Team
Go to Dashboard > Team. You’ll see tabs at the top to switch between collaborator types:
- Partner — your co-planner with full access
- Bridal party — wedding party members with customizable permissions
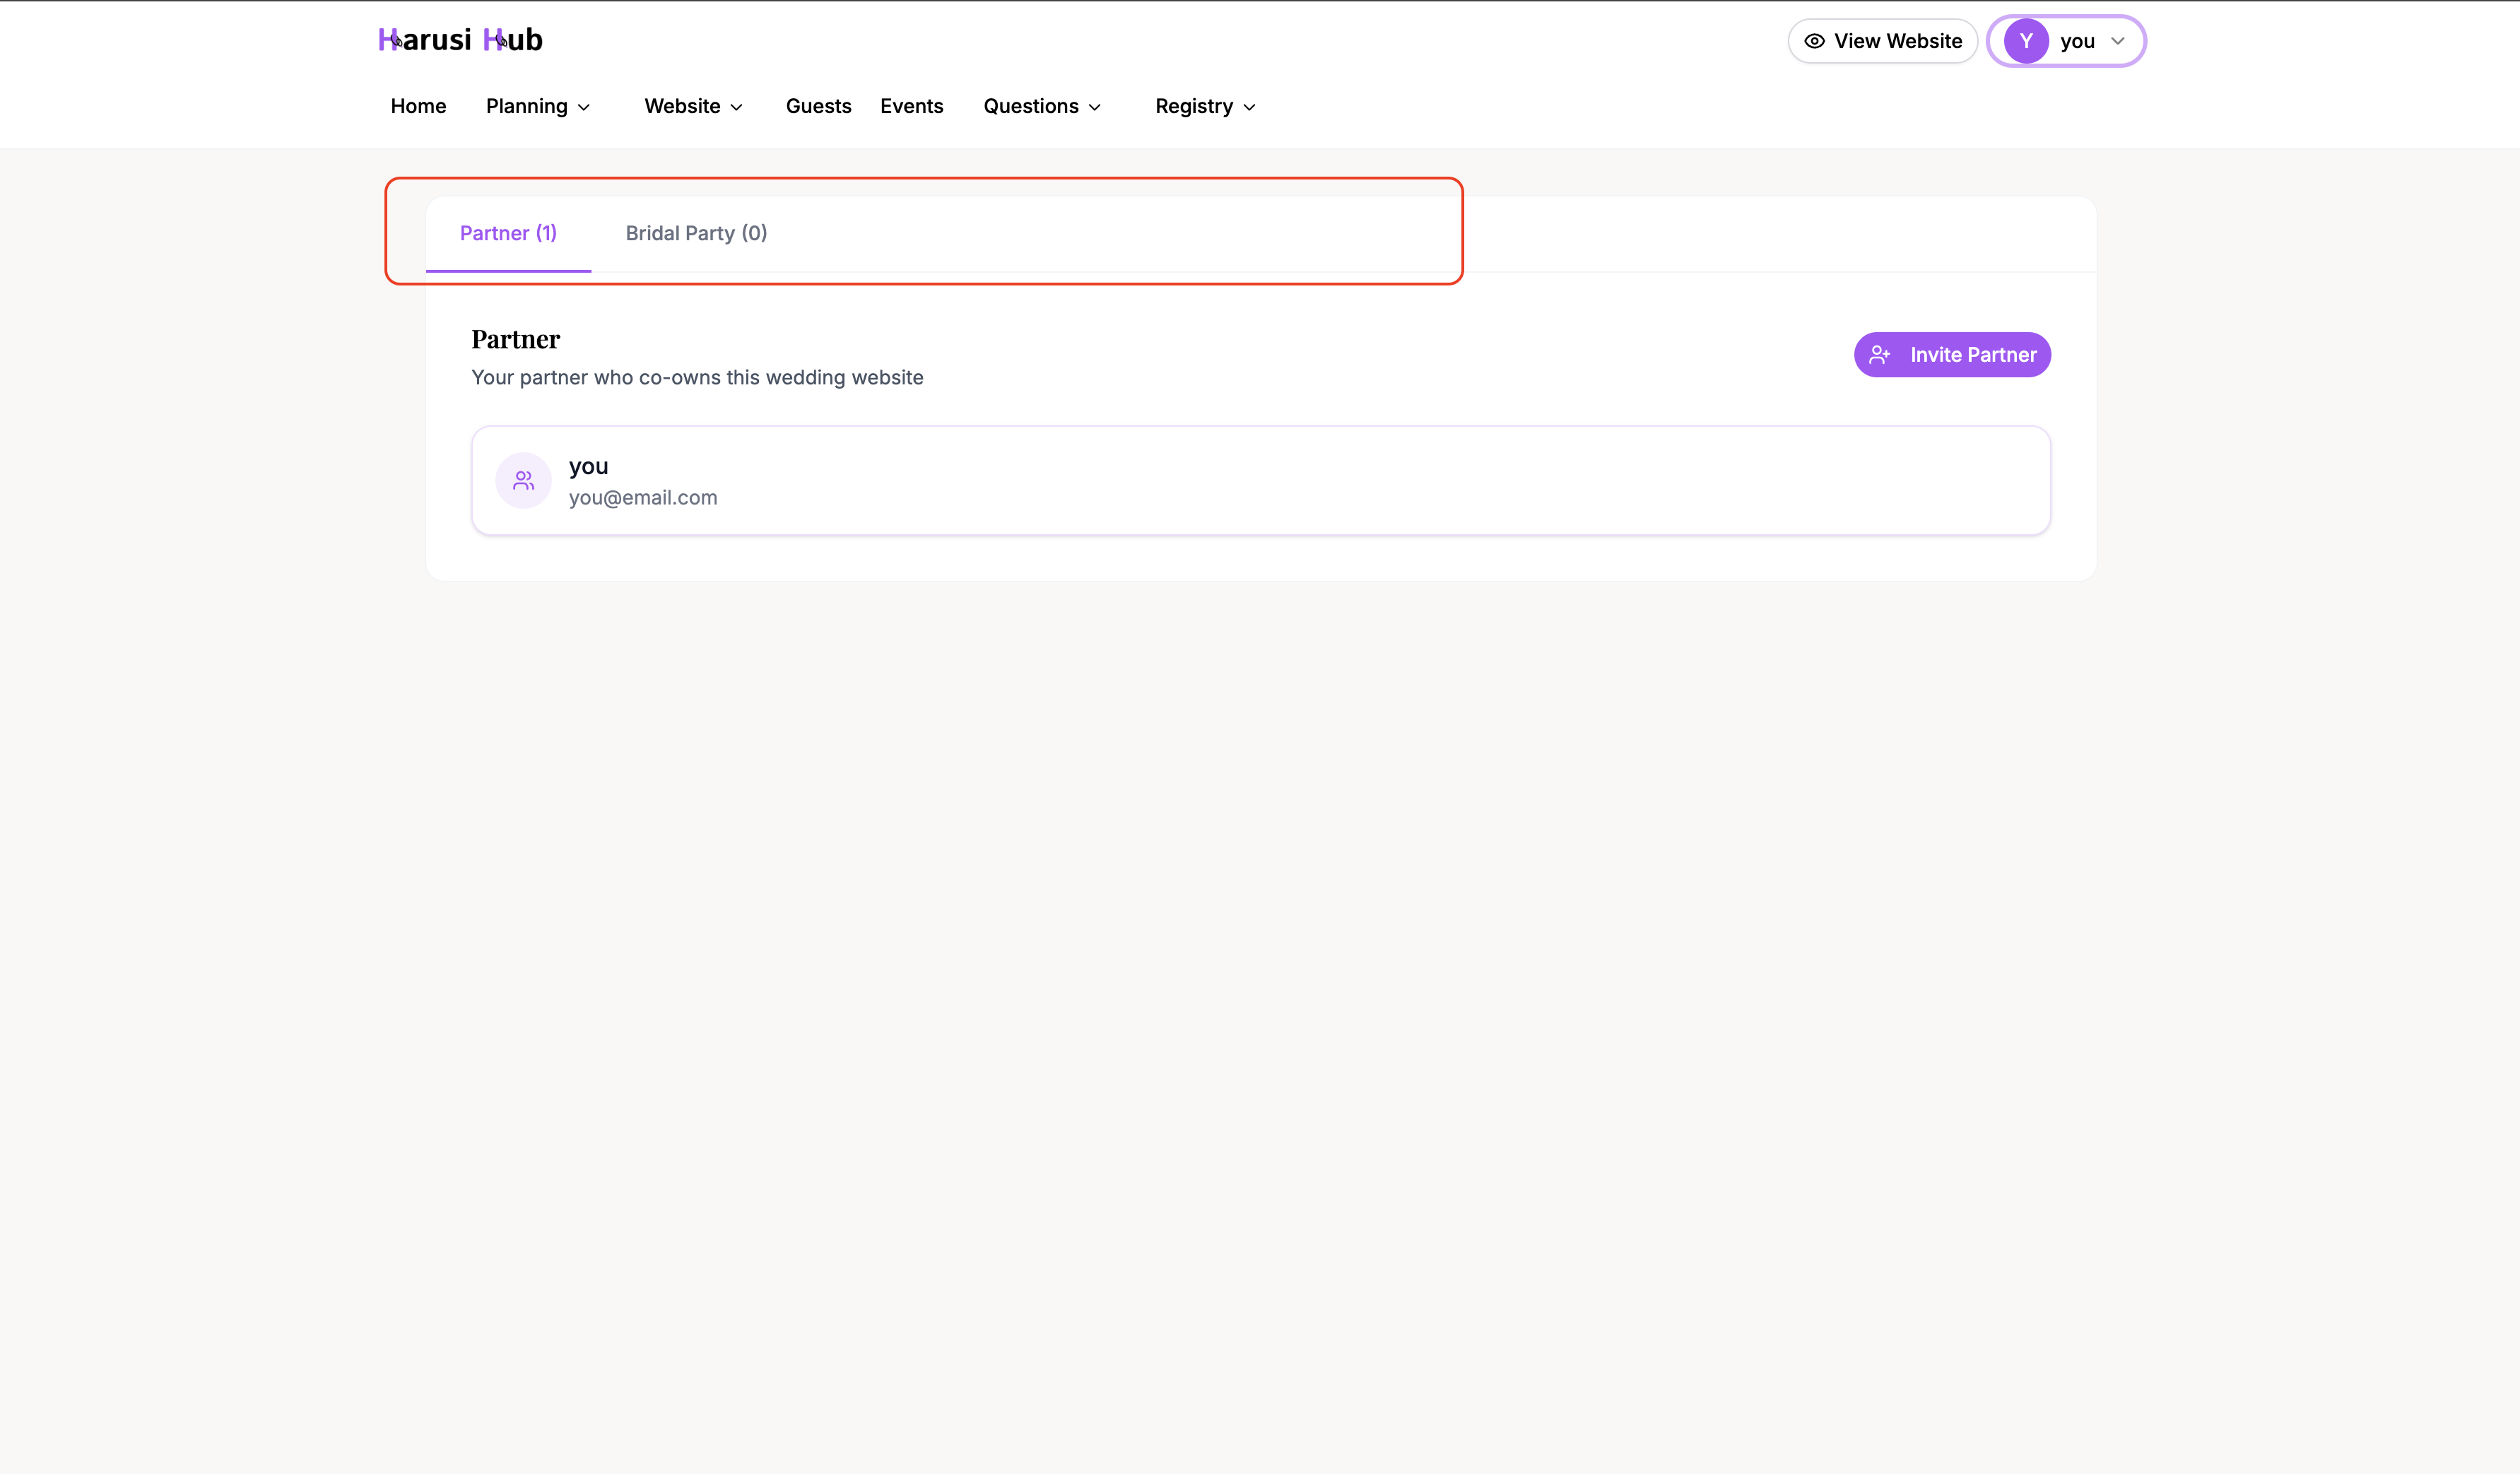
Inviting Your Partner
Partners are co-owners of the wedding. Once a partner accepts your invitation, they have the same full access that you do — editing the website, managing guests, updating the budget, and everything else.
How to Send an Invite
- Click the Partner tab
- Click Invite member
- Enter your partner’s email address
- Click Send invite
Your partner will receive an email with a link to join your wedding on Harusi Hub.
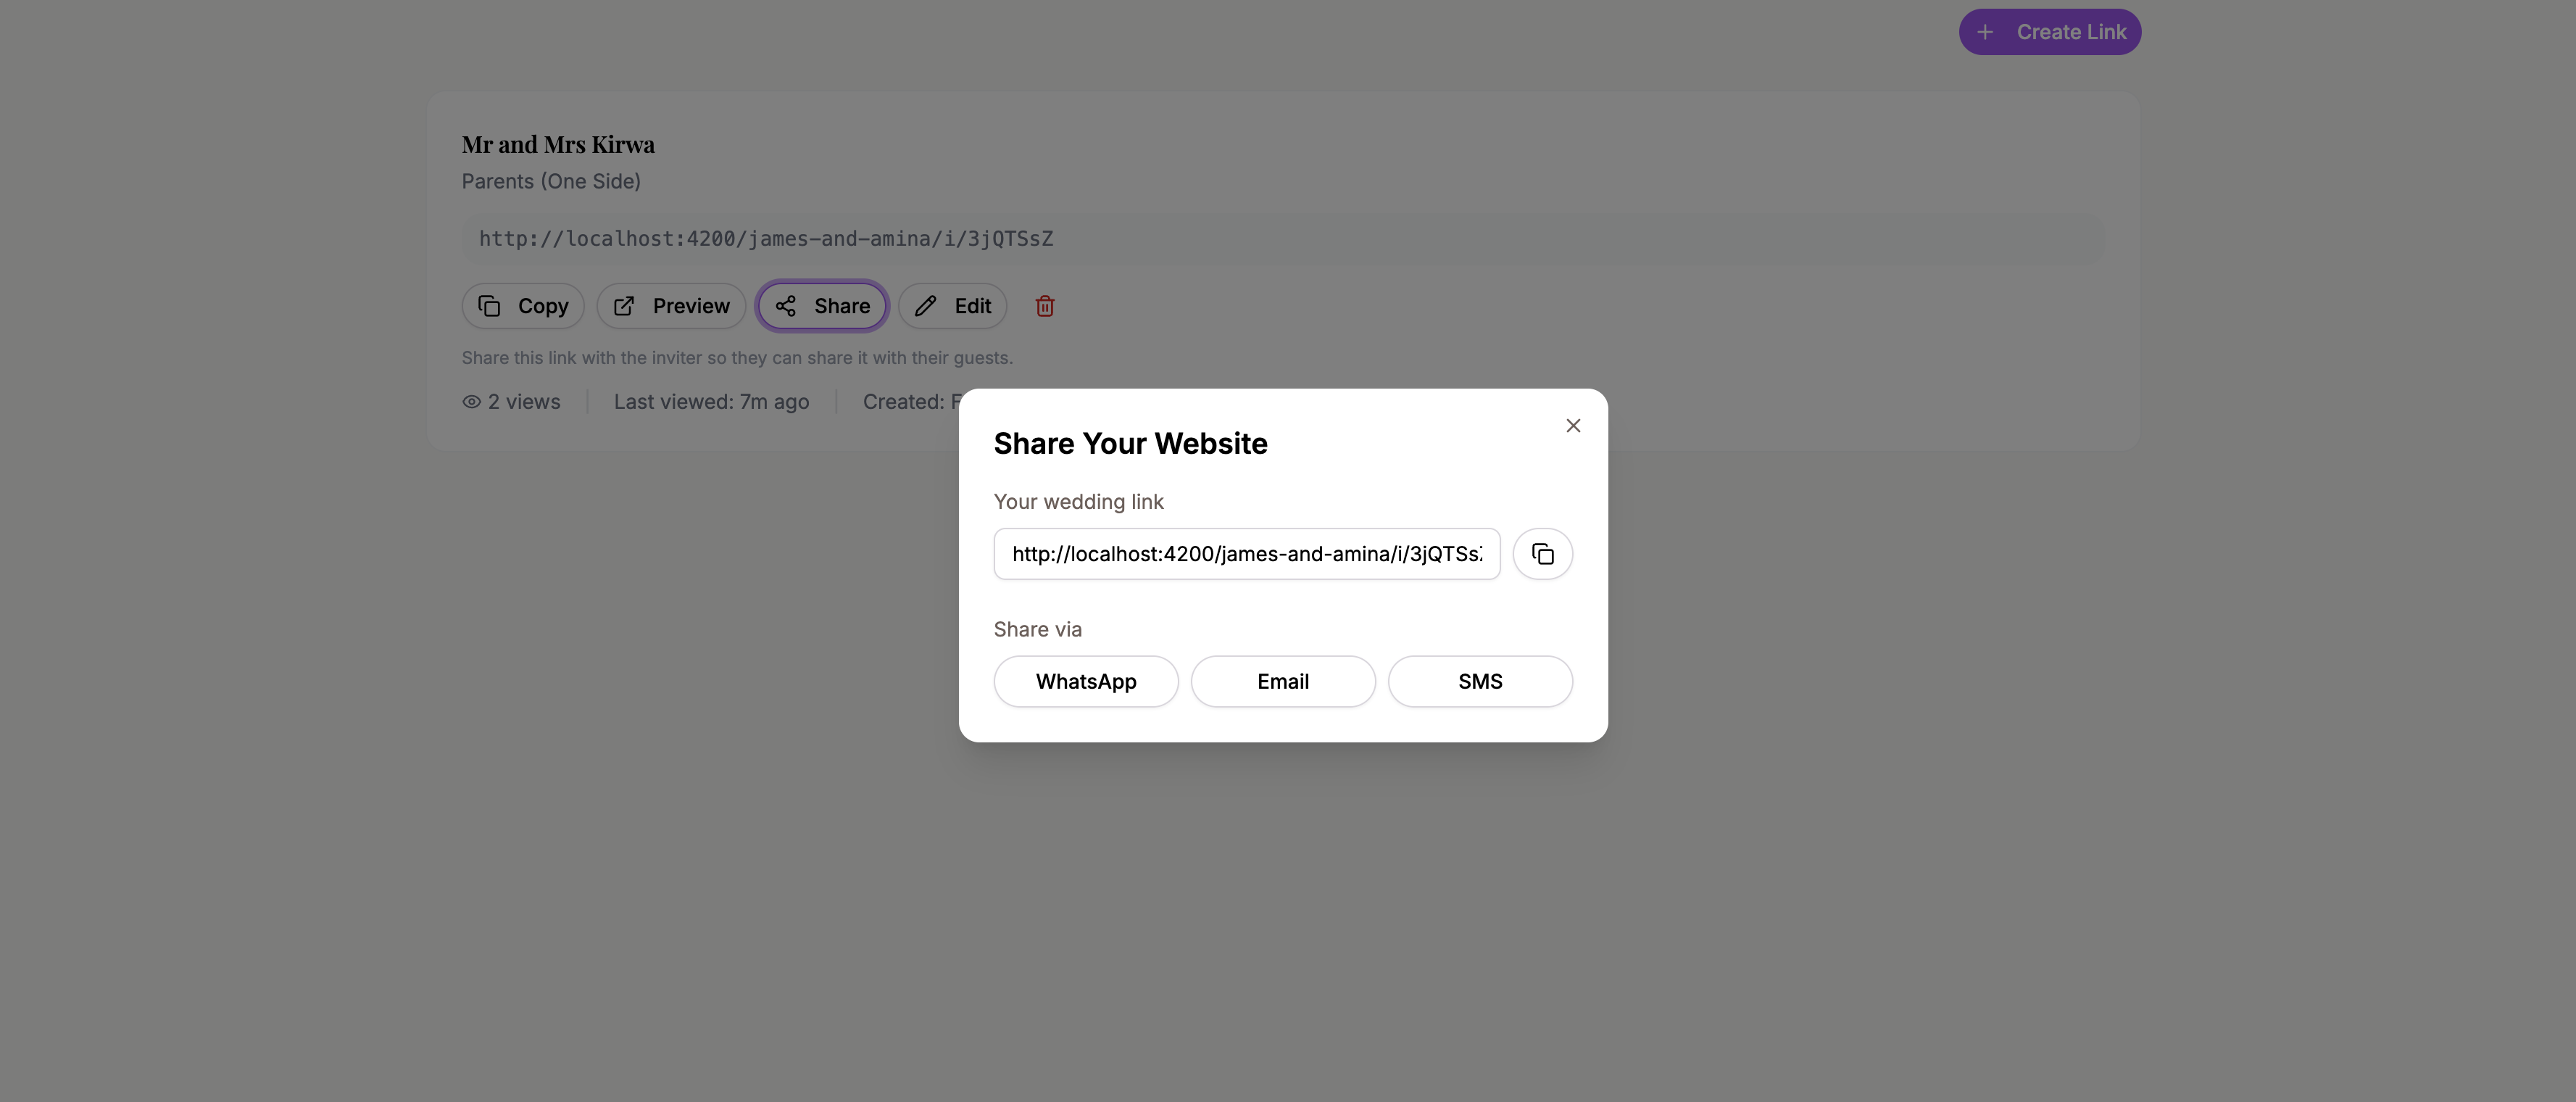
Sharing the Invite Link
You can also share the invite link directly through:
- WhatsApp — sends a pre-filled message
- Email — opens your email client with the link
- SMS — sends a text message
- Copy Link — copies the link to your clipboard
Click the Share button next to the pending invitation to see all sharing options.
Invitation Expiration
Invite links expire for security reasons. You’ll see a countdown showing the days remaining before the link expires. If it does expire, you can:
- Click Resend to send a fresh invitation
- Click Create New Invitation to generate a new invite link
Note that the wedding owner cannot be removed from the account. If you created the wedding, you will always remain an owner.
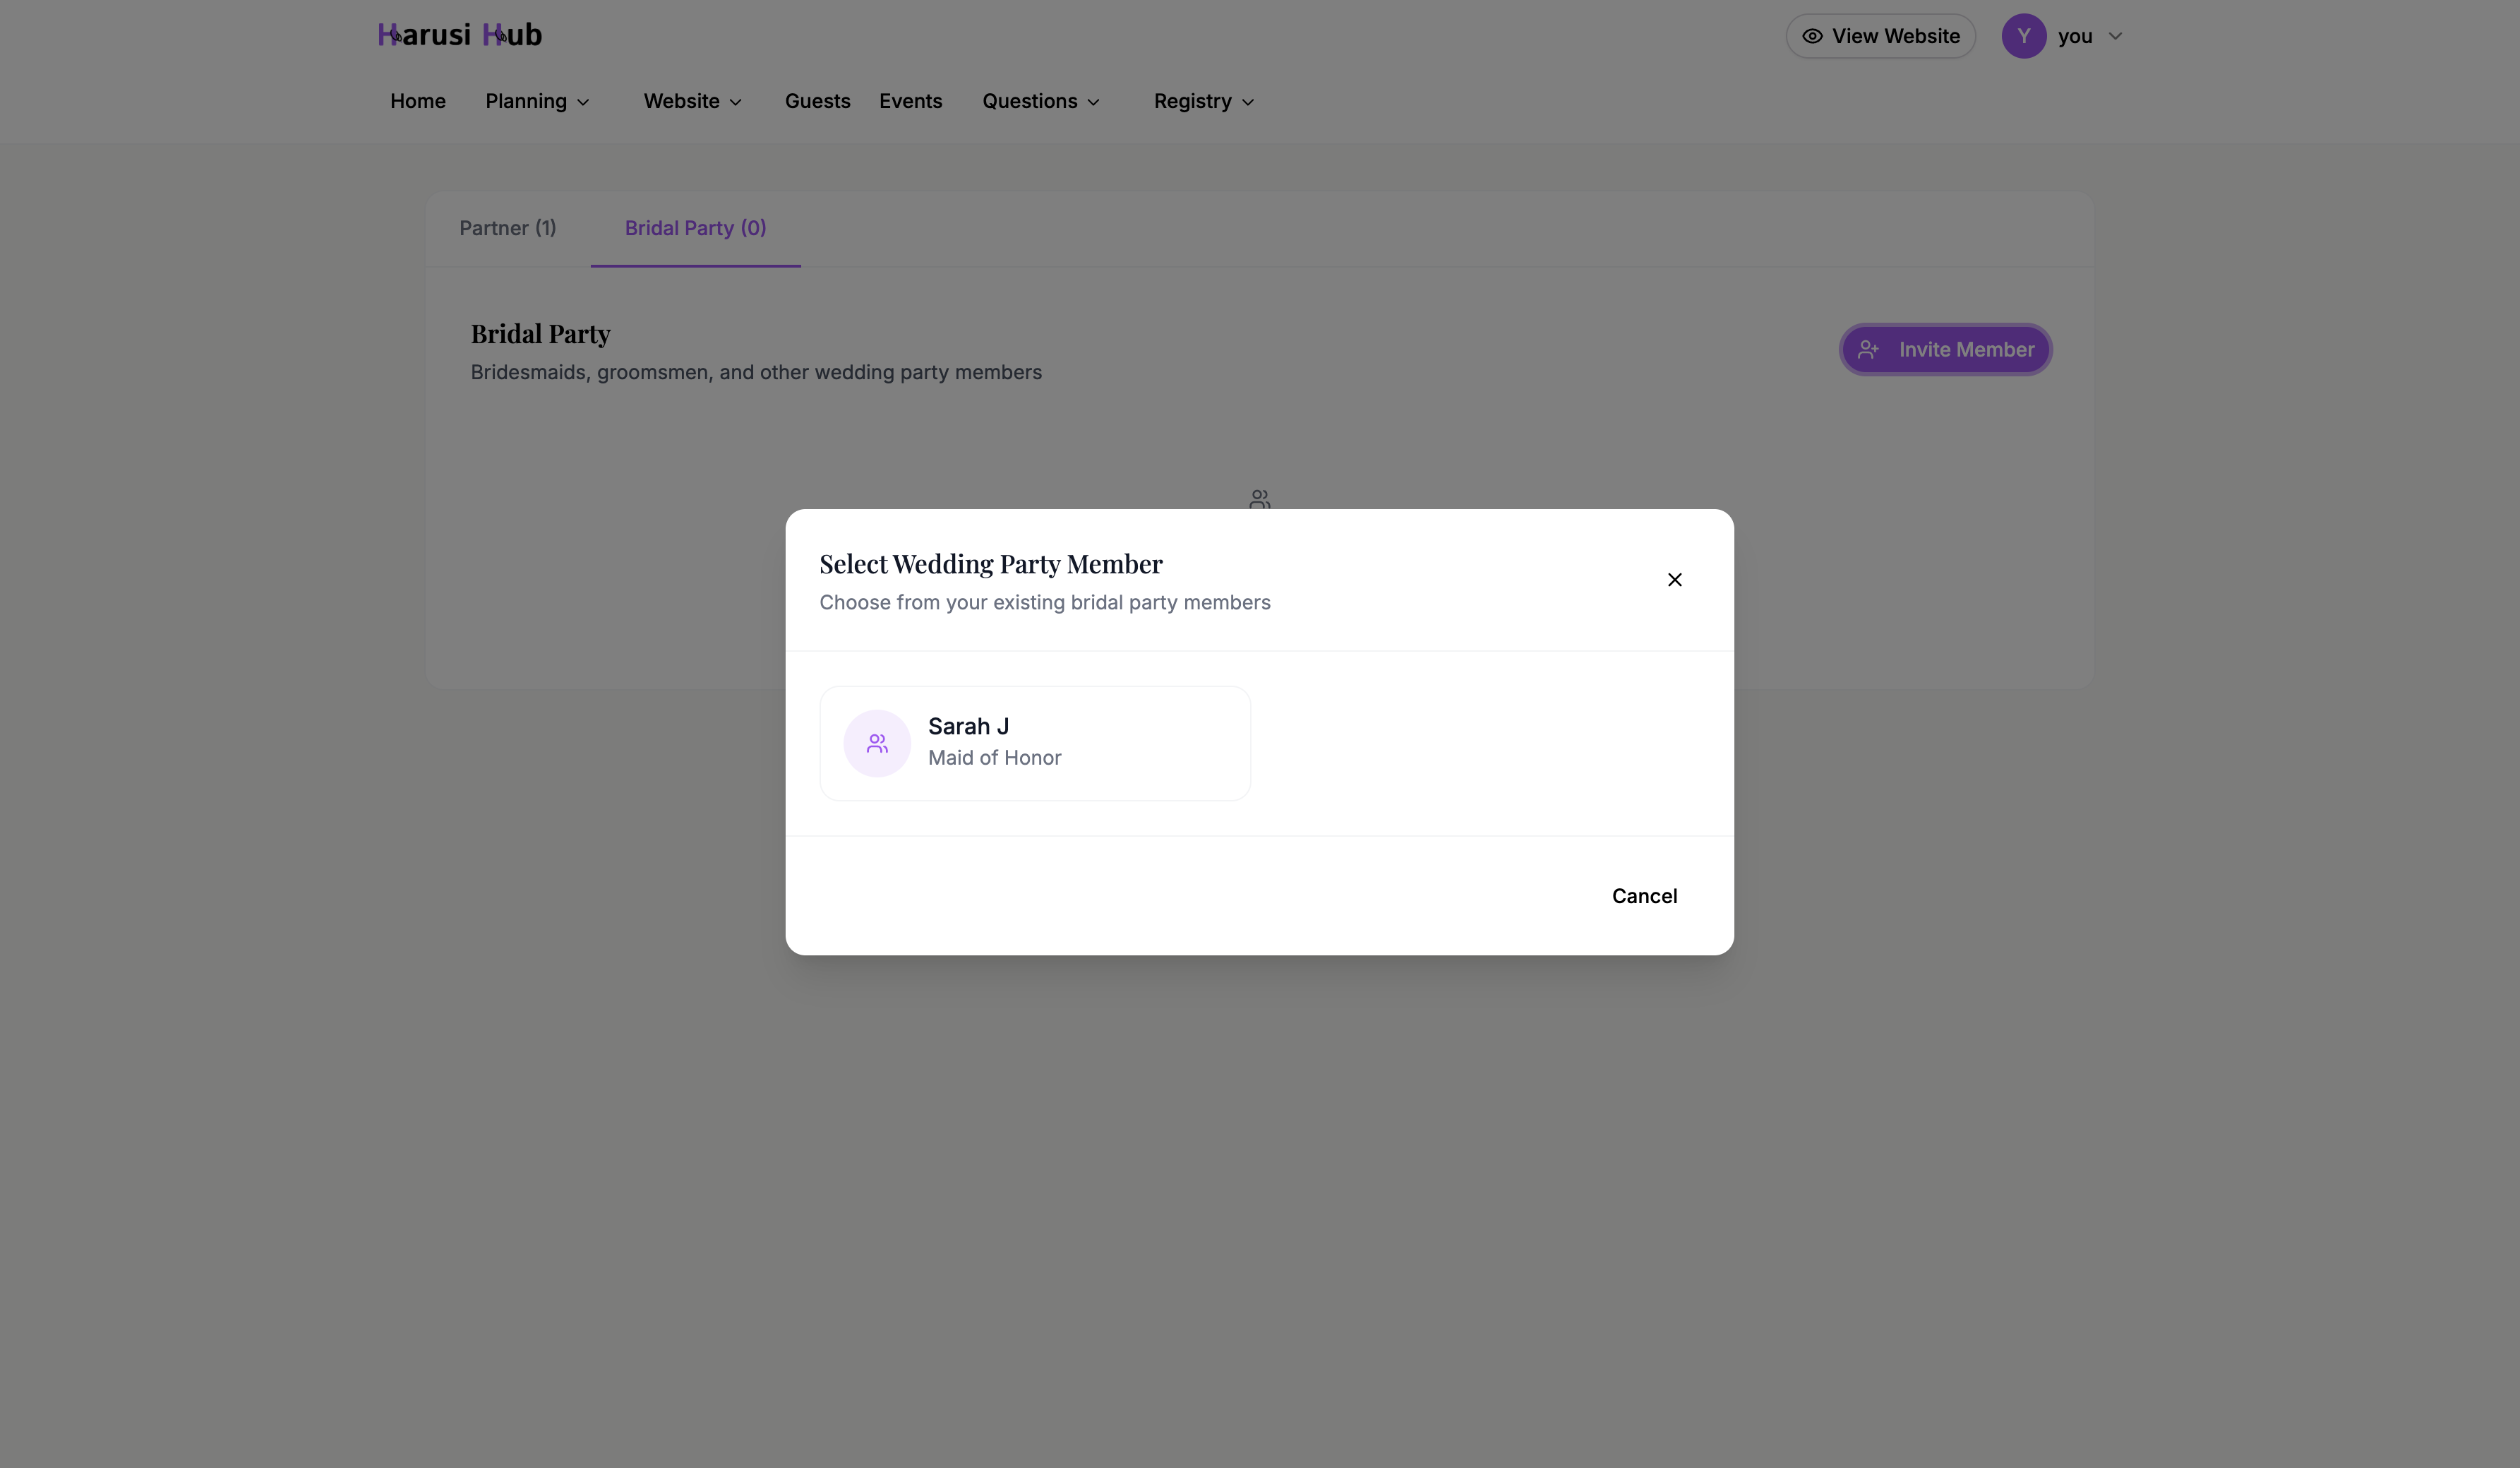
Managing Bridal Party Members
The Bridal Party tab lets you invite bridesmaids, groomsmen, and other wedding party members as collaborators with limited, customizable permissions.
Inviting a Bridal Party Member
- Click the Bridal Party tab
- Click Invite member
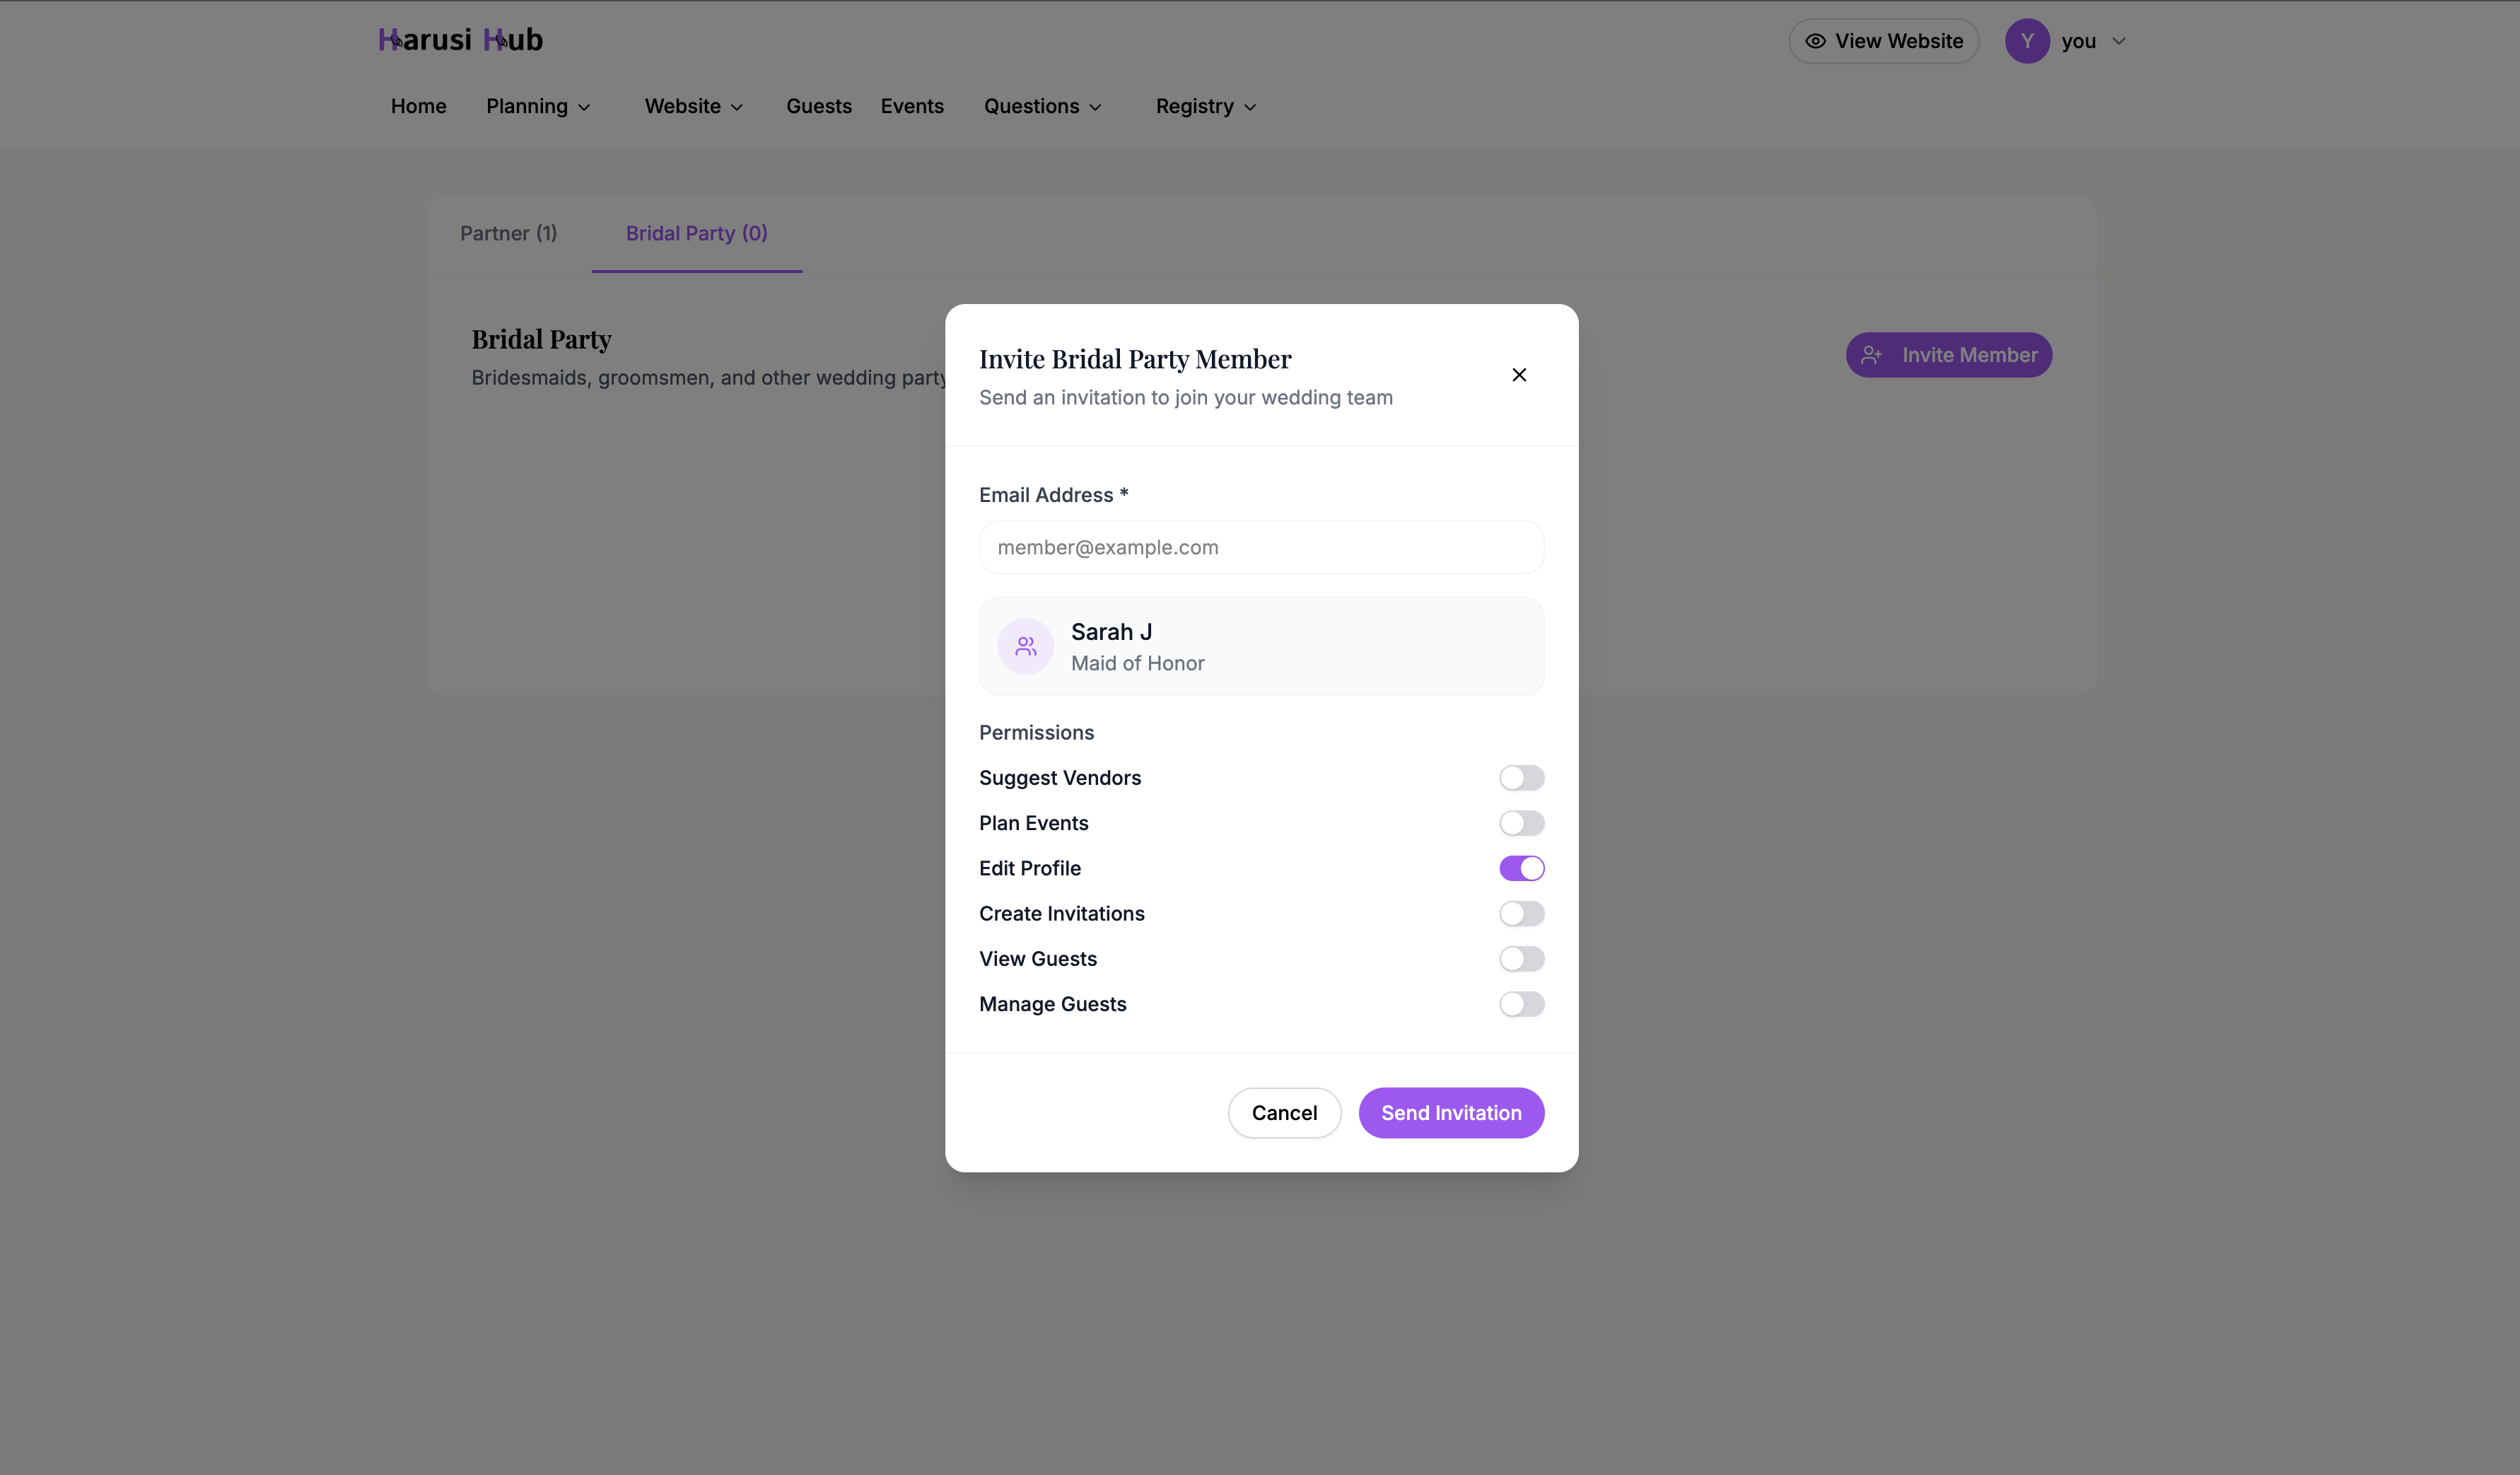
- Fill in the invite form:
- Email address (required) — their email address
- Name (optional) — their display name
- Role title (optional) — e.g., “Bridesmaid,” “Best Man,” “Maid of Honor”
- Set their permissions using the toggle switches
- Click Send invite
Understanding Permissions
Each bridal party collaborator has 6 configurable permissions that you can turn on or off:
| Permission | What It Allows |
|---|---|
| Can suggest vendors | Browse and suggest vendors for your wedding |
| Can plan events | Create and edit wedding events and schedule |
| Can edit profile | Update their own profile information |
| Can create invitations | Generate and send guest invitations |
| Can view guests | See the guest list and RSVP statuses |
| Can manage guests | Add, edit, and remove guests from the list |
Default permissions depend on the collaborator type. Review the toggles before sending an invite, then adjust permissions any time after the invitation is sent.
Editing Permissions Later
To change a collaborator’s permissions after they’ve been added:
- Find the member in the Bridal Party list
- Click the member’s permissions action
- In the Edit Permissions dialog, toggle each permission on or off
- Save your changes
The member list shows each person’s name, role, email, and permission badges so you can quickly see what access everyone has.
Tips for Managing Collaborators
- Start with minimal permissions and add more as needed. It’s easier to grant access than to revoke it.
- Use role titles that match your wedding party structure so everyone’s responsibilities are clear.
- Check the Bridal Party tab regularly to review who has access and what they can do, especially as your wedding date approaches.